Create NFT collection and metadata
In this article, we will learn to create NFT metadata and use it in our NFT minting process. We will create a bunch of digital avatars as png images and create metadata files for each image and upload it in IPFS(InterPlanetary File System).
This is the 2nd part of NFT tutorial series. You can find 1st and 3rd part in links below:
1st part: Write and deploy NFT Smart Contracts
3rd part: Mint NFTs with web3.js
Data source for NFT images and metadata
We will use already existing script files and image files to create our list of avatars. We will combine unique traits of different parts of the face like hair, nose, eyes, ears, and mouth and, create a unique avatar for each nft metadata.
We will use data from the repository of `Substrapunks` by usetech-llc. You can clone the repository or download it from this link. Please feel free to look around the files especially inside scripts/face_parts because we will use image files from that specific folder.
Creating NFT Avatars
You need to have python installed in your system since we will write a python program to create avatar files and metadata collections. Create a file named create-avatars.py file in the root directory and copy and paste the below code in the file.
from PIL import Image
import random
import json
import os

# Each image is made up a series of traits
# The weightings for each trait drive the rarity and add up to 100%

face = ["White", "Black"]
face_weights = [60, 40]

ears = ["No Earring", "Left Earring", "Right Earring", "Two Earrings"]
ears_weights = [25, 30, 44, 1]

eyes = ["Regular", "Small", "Rayban", "Hipster", "Focused"]
eyes_weights = [70, 10, 5 , 1 , 14]

hair = ['Up Hair', 'Down Hair', 'Mohawk', 'Red Mohawk', 'Orange Hair', 'Bubble Hair', 'Emo Hair',
 'Thin Hair',
 'Bald',
 'Blonde Hair',
 'Caret Hair',
 'Pony Tails']
hair_weights = [10 , 10 , 10 , 10 ,10, 10, 10 ,10 ,10, 7 , 1 , 2]

mouth = ['Black Lipstick', 'Red Lipstick', 'Big Smile', 'Smile', 'Teeth Smile', 'Purple Lipstick']
mouth_weights = [10, 10,50, 10,15, 5]

nose = ['Nose', 'Nose Ring']
nose_weights = [90, 10]

#Classify traits

face_files = {
    "White": "face1",
    "Black": "face2"
}

ears_files = {
    "No Earring": "ears1",
    "Left Earring": "ears2",
    "Right Earring": "ears3",
    "Two Earrings": "ears4"
}

eyes_files = {
    "Regular": "eyes1",
    "Small": "eyes2",
    "Rayban": "eyes3",
    "Hipster": "eyes4",
    "Focused": "eyes5"
}

hair_files = {
    "Up Hair": "hair1",
    "Down Hair": "hair2",
    "Mohawk": "hair3",
    "Red Mohawk": "hair4",
    "Orange Hair": "hair5",
    "Bubble Hair": "hair6",
    "Emo Hair": "hair7",
    "Thin Hair": "hair8",
    "Bald": "hair9",
    "Blonde Hair": "hair10",
    "Caret Hair": "hair11",
    "Pony Tails": "hair12"
}

mouth_files = {
    "Black Lipstick": "m1",
    "Red Lipstick": "m2",
    "Big Smile": "m3",
    "Smile": "m4",
    "Teeth Smile": "m5",
    "Purple Lipstick": "m6"
}

nose_files = {
    "Nose": "n1",
    "Nose Ring": "n2"
}

## Generate Traits

TOTAL_IMAGES = 25 # Number of random unique images we want to generate

all_images = []

# A recursive function to generate unique image combinations
def create_new_image():
    new_image = {}

    # For each trait category, select a random trait based on the weightings
    new_image ["Face"] = random.choices(face, face_weights)[0]
    new_image ["Ears"] = random.choices(ears, ears_weights)[0]
    new_image ["Eyes"] = random.choices(eyes, eyes_weights)[0]
    new_image ["Hair"] = random.choices(hair, hair_weights)[0]
    new_image ["Mouth"] = random.choices(mouth, mouth_weights)[0]
    new_image ["Nose"] = random.choices(nose, nose_weights)[0]

    if new_image in all_images:
        return create_new_image()
    else:
        return new_image


# Generate the unique combinations based on trait weightings
for i in range(TOTAL_IMAGES):
    new_trait_image = create_new_image()

    all_images.append(new_trait_image)

# Returns true if all images are unique
def all_images_unique(all_images):
    seen = list()
    return not any(i in seen or seen.append(i) for i in all_images)

print("Are all images unique?", all_images_unique(all_images))

# Add token Id to each image
i = 0
for item in all_images:
    item["tokenId"] = i
    i = i + 1

# Get Trait Counts

face_count = {}
for item in face:
    face_count[item] = 0

ears_count = {}
for item in ears:
    ears_count[item] = 0

eyes_count = {}
for item in eyes:
    eyes_count[item] = 0

hair_count = {}
for item in hair:
    hair_count[item] = 0

mouth_count = {}
for item in mouth:
    mouth_count[item] = 0

nose_count = {}
for item in nose:
    nose_count[item] = 0

for image in all_images:
    face_count[image["Face"]] += 1
    ears_count[image["Ears"]] += 1
    eyes_count[image["Eyes"]] += 1
    hair_count[image["Hair"]] += 1
    mouth_count[image["Mouth"]] += 1
    nose_count[image["Nose"]] += 1


#### Generate Images

os.mkdir(f'./images')

for item in all_images:

    im1 = Image.open(f'./scripts/face_parts/face/{face_files[item["Face"]]}.png').convert('RGBA')
    im2 = Image.open(f'./scripts/face_parts/eyes/{eyes_files[item["Eyes"]]}.png').convert('RGBA')
    im3 = Image.open(f'./scripts/face_parts/ears/{ears_files[item["Ears"]]}.png').convert('RGBA')
    im4 = Image.open(f'./scripts/face_parts/hair/{hair_files[item["Hair"]]}.png').convert('RGBA')
    im5 = Image.open(f'./scripts/face_parts/mouth/{mouth_files[item["Mouth"]]}.png').convert('RGBA')
    im6 = Image.open(f'./scripts/face_parts/nose/{nose_files[item["Nose"]]}.png').convert('RGBA')

    #Create each composite
    com1 = Image.alpha_composite(im1, im2)
    com2 = Image.alpha_composite(com1, im3)
    com3 = Image.alpha_composite(com2, im4)
    com4 = Image.alpha_composite(com3, im5)
    com5 = Image.alpha_composite(com4, im6)

    #Convert to RGB
    rgb_im = com5.convert('RGB')
    file_name = str(item["tokenId"]) + ".png"
    rgb_im.save("./images/" + file_name)


#### Generate Metadata for all Traits
os.mkdir(f'./metadata')

METADATA_FILE_NAME = './all-traits.json';
with open(METADATA_FILE_NAME, 'w') as outfile:
    json.dump(all_images, outfile, indent=4)
The above script is extracted from the article by Edward Jones. Please feel free to look into the explanation for each of the code segments.
Run the above program in your terminal. You will find images of the avatar inside the images folder. Also, you will find all-traits.json file in your root directory with collections of objects with unique traits and token IDs like below.
[
    {
        "Face": "White",
        "Ears": "No Earring",
        "Eyes": "Rayban",
        "Hair": "Bubble Hair",
        "Mouth": "Purple Lipstick",
        "Nose": "Nose",
        "tokenId": 0
    },
    {
        "Face": "Black",
        "Ears": "Right Earring",
        "Eyes": "Regular",
        "Hair": "Mohawk",
        "Mouth": "Big Smile",
        "Nose": "Nose",
        "tokenId": 1
    }
]
Upload Avatars in Pinata
The next step is to upload all the images to IPFS. For test purposes, we will use Pinata as IPFS to host our images and metadata. Create an account in pinata if you do not have one already. Now click Add Files and upload the images folder there.
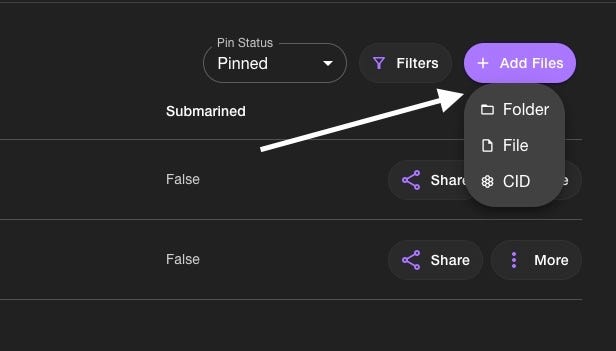
On successful upload of the folder with the images file, you can see the list of images below.

Copy the URL from this page as it will be used to create metadata later. It will look like this: https://gateway.pinata.cloud/ipfs/{CID} . CID is Content identifier that you can get on the files list page of the pinata.
Create NFT metadata
Now let’s generate NFT metadata. Create a new file named create-metadata.py in the root directory and copy and paste the below code.
#### Generate Metadata for each Image
import json

f = open('./all-traits.json')
data = json.load(f)

# Changes this IMAGES_BASE_URL to yours
IMAGES_BASE_URL = "https://gateway.pinata.cloud/ipfs/{CID}/"
PROJECT_NAME = "My NFT"

def getAttribute(key, value):
    return {
        "trait_type": key,
        "value": value
    }
for i in data:
    token_id = i['tokenId']
    token = {
        "image": IMAGES_BASE_URL + str(token_id) + '.png',
        "tokenId": token_id,
        "name": PROJECT_NAME + ' ' + str(token_id),
        "attributes": []
    }
    token["attributes"].append(getAttribute("Face", i["Face"]))
    token["attributes"].append(getAttribute("Ears", i["Ears"]))
    token["attributes"].append(getAttribute("Eyes", i["Eyes"]))
    token["attributes"].append(getAttribute("Hair", i["Hair"]))
    token["attributes"].append(getAttribute("Mouth", i["Mouth"]))
    token["attributes"].append(getAttribute("Nose", i["Nose"]))

    with open('./metadata/' + str(token_id), 'w') as outfile:
        json.dump(token, outfile, indent=4)
f.close()
You need to replace CID with a real id from your pinata folder. Also before running this file, make sure you have a metadata folder created from create-avatars.py file. Run this program file. It will create metadata files for each image that we created inside the metadata folder. It will contain trait information and image URL in JSON format like below.
{
"image": "https://gateway.pinata.cloud/ipfs/{CID}/0.png",
"tokenId": 0,
"name": "My NFT 0",
"attributes": [
{
"trait_type": "Face",
"value": "White"
},
{
"trait_type": "Ears",
"value": "No Earring"
},
{
"trait_type": "Eyes",
"value": "Regular"
},
{
"trait_type": "Hair",
"value": "Down Hair"
},
{
"trait_type": "Mouth",
"value": "Big Smile"
},
{
"trait_type": "Nose",
"value": "Nose"
}
]
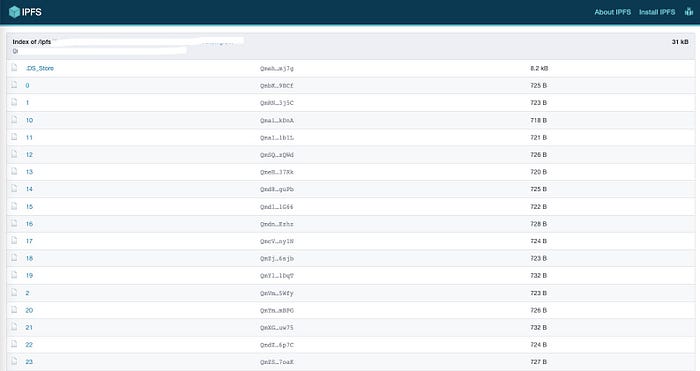
}Now upload the metadata folder with all files to pinata just like we upload images before. It will look like this.
Again copy the URL from this page. This will be our base URL which we will use when minting NFT.
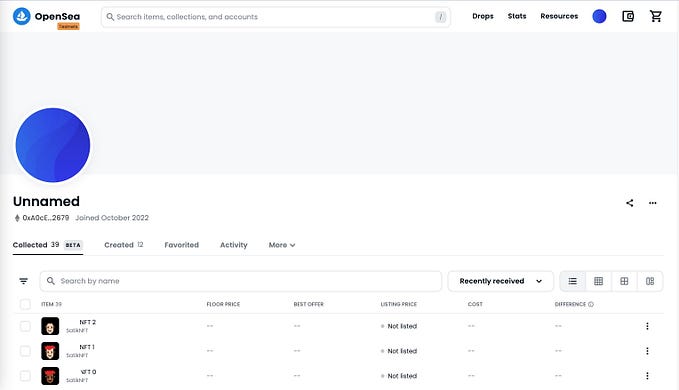
In the next article, we will learn to mint the NFT and also view our NFT in metamask or opensea account.
3rd part: Mint NFTs with web3.js